Showing posts with label Sewaholic. Show all posts

Sunday, May 18, 2014

How to Sew a Ribbon Hem

Sewing ribbon to the hem edge of a garment is an easy finishing technique. It adds an extra detail and can also be used to preserve the length of the hem. I regularly use ribbon to finish hems as well as sleeve and neckline edges, though I wasn't always confident in doing so. The soon-to-begin Belcarra Sewalong means that it's as good a time as any to show how I sew ribbon hems.


I sewed ribbon hems for the two Belcarra blouses from Sewaholic Patterns that I recently made. I liked the unhemmed length of the blouses, and didn't want to turn up a full hem. Also, the fabric in both was lightweight, so I wanted to add a little weight to the hems.


A huge variety of ribbons will work for hemming purposes. It is useful, but not necessary, to match the ribbon type with the fabric type. For the beige Liberty tana lawn cotton Belcarra blouse, I used a cotton stitched ribbon from janemeans. For the green AnnaMarie Horner cotton voile blouse, I used a polyester ribbon also from janemeans.

I would strongly recommend prewashing the ribbon in the same manner that you will treat the finished garment.


What you need:

-A sharp/new sewing machine needle

-Good quality grosgrain or cotton ribbon, the same length (+1.5cm overlap) as the hem

-Matching thread colour - matched to the ribbon colour rather than the fabric.

-Garment with side seams sewn & finished, ready for hemming


Step 1:

Place the wrong sides of the fabric and ribbon together. If the ribbon doesn't have a wrong side, choose one side as the wrong side.

Place the ribbon on the fabric so that the right side of the ribbon and the wrong side of the fabric both face up as in the picture

Ensure the ribbon overlaps the fabric edge by approx 1cm or up to half the width of the ribbon.


Sew the long left edge of the ribbon to the hem edge using a long stitch length. The line of stitching should be approx 2-3mm in from the long left ribbon edge.


Step 2:
When you have stitched all around the hem, cut the ribbon allowing for an extra 1.5 cm to fold under. Fold the end of the ribbon in by 1.5 cm and continue sewing. Backstitch when you have sewn the overlap. This line of stitching will become the lower edge of the garments hem.


Step 3:
Turn the garment so that the right side of the fabric faces upward. Fold the ribbon over at the stitching line, so that the ribbon covers the raw hem edge and the right side of both the ribbon and the fabric are facing up. Press the ribbon and fabric.


Step 4:
With the right sides of the fabric and ribbon facing upwards, sew along the edge of the ribbon, enclosing the raw edge of the fabric.


Step 5

When you reach the folded short end of the ribbon, sew across the ribbon width and backstitch to finish.


Step 6:

Press hem edge again.


This technique works perfectly on straight hem edges, but will also work on a slightly curved edge. If you wish to sew a ribbon hem on a circle skirt/dress edge, a narrow ribbon will work better.


Pin It Now!  

Wednesday, April 23, 2014

Belcarra Blouse - So good I sewed it twice!

The newest pattern from Sewaholic Patterns is the Belcarra Blouse, and I had the opportunity to test the pattern before it was released.

The style is a looser silhouette than I usually wear, but what surprised me most about the pattern was how the 2d curved pattern shapes transformed to 3d without needing darts or other fitting techniques. Though it is a loose-fitting style, it works by also being shapely...or making the wearer look shapely!

The size I cut was 12 and this is what usually fits me best in Sewaholic patterns. Sometimes I have to shorten above the waist, but I didn't do that for the Belcarra, as my measurements of the pattern pieces in comparison to my body measurements indicated I didn't need to.


The biggest difficulty I had with this blouse was fabric selection I just couldn't decide what to use. I originally planned on a medium weight black and white cotton gingham but thought that the loose style of the blouse wouldn't be as flattering in a heavier fabric. So I picked Liberty of London cotton voile 'Toria' that I'm delighted with.


http://sewaholic.net/also-introducing-the-belcarra-blouse/


Tasia's advice on choosing fabric for this blouse is spot on - pick something special, because the lack of front and back seams and darts mean that the fabric gets the limelight!! Her Liberty of London version illustrates her advice perfectly.


I chose to sew View B mostly because of the tucks in the raglan sleeves. They are such a neat detail on this lovely simple design. As the print on the fabric is so busy, the tuck detail seemed to get lost, so I added some matching janemeans ribbon to the shoulder seam to help draw attention to the tucks.


Using the same stitched ribbon as I used to cover the shoulder seams, I repeated the ribbon detail at the hem. I liked the unhemmed length of the blouse, so adding ribbon meant that I could keep most of the blouse length.
 

As the voile fabric is so light weight, I wanted to ensure it would hang well. Another reason for sewing a ribbon hem is that it adds a little extra weight to a fabric like voile.


The second Belcarra blouse was a very quick make-not even a couple of hours! The fabric is also a cotton voile from AnnaMarie Horner. This version came about as a result of #misemademairt / #misemademáirt (general Irish to English translation = Me Made Tuesday). Three of us - also Maeve & MsMcCall - from Ireland have been wearing something we made ourselves for Tuesdays in Feb and March and posting on Instagram. This was my attempt to wear something me-made and green(ish) for St. Patricks Day.

For this version, I slightly adjusted the neckline. The neckline in the pattern pictures seemed wider than I prefer, so I made a simple adjustment by adding an extra seam allowance width to the top of the sleeve pieces and back and front pieces. I also measured the resulting neck opening and compared it to my head measurment to be sure it would fit! The length of the neck binding also needs to be reduced to fit the new neck opening measurment.


Even though the blouse is a simple style, there are some neat techniques in the pattern. The bias binding is sewn doubled over and this gives a nice flat finish. The sleeve cuffs are also well designed. I didn't compare my arm measurements with the cuff length, before cutting and sewing. The sleeve cuff fits, but I would usually wear it a little looser.

The blouse makes for a very easy-to-wear top and I love the raglan sleeves. Now that I know that the style fits in a flattering way, I would like to try it in gingham, with a bias pocket and tucks on the sleeves forming a neat design with the lines of the gingham fabric.


Pin It Now!  

Thursday, July 25, 2013

Pattern Testing (and talking to) the Sewaholic Saltspring

 
I have clear ideas on the styles that I like to sew, and that I think suit me, but sometimes an opportunity comes along that pushes me out of my comfort zone. Having previously sewn the Lonsdale Dress and the Minoru Jacket from Sewaholic Patterns, I was delighted to get to test Tasia's new pattern the Saltspring Dress.
It is a deceptively simple style which hides the cleverness of the design. The shorter inner bodice layer and the longer outer bodice layer are joined inside, to make an elastic casing which then gives the dress it's blousiness.
What makes the dress work, and gives it shape, is how it is designed. For example, the skirt pieces are shaped, rather than being rectangles, so that there is not too much bulk when it's gathered with elastic at the waist. Tasia has taken a relaxed shape and designed a very flattering dress. She has given a detailed description of the dress on her website, with lots of great pictures.

I tend to wear more fitted styles, so when I first saw the line drawing of the Saltspring Dress, I wasn't sure how I felt about the blousy style. Having wide shoulders and hips, I thought the dress would give me a more rectangular rather than curvy shape. This was the major reason I chose chiffon and satin so that the dress would be very, very 'drapey'. However all niggly doubts disappeared when I tried the dress on for the first fitting. I had an 'Oh wow!' moment, impressed at how flattering it was looking and even surprised that liked how it was going to look on me. And, as a another plus, I've wanted to sew a red chiffon dress forever.


The chiffon and satin are sewn with French seams at the bodice and skirt side seams, so I omitted the pockets in the skirt side seams for this version. I had to add a lining to the skirt as the chiffon is sheer. This involved cutting skirt lining pieces using the back and front skirt pattern pieces and then treating the main skirt and skirt lining as one at the top and at the zip, following the pattern instructions.

It's definitely a dress to make an impression! especially the maxi length. I asked my husband for help with hemming the chiffon and the satin after allowing the dress to hang for a few days. As this absolutely wouldn't be my usual daily attire, he was almost speechless when he saw it on me - the exact words were "you....are like....a......Greek" I'm really hoping he was going to say 'goddess' but he was so stuck for words he didn't quite finish what he was saying!


I had a lot of trouble with the straps, which is no reflection at all on the pattern or instructions, but rather on the fact that I have avoided turning straps at every single opportunity, by using ribbons instead.

This time I wanted to follow the pattern and sew spaghetti straps, so I persevered. I was using the needle and thread method but I was getting stressed and frustrated that I couldn't get the end of the strap to turn.


After checking the Internet I saw a reference to a drinking straw. Amazingly and simply it worked, and I was able to turn these lovely narrow straps! I wrote up a How-to for anyone else who struggles with this.


The zipper insertion looked a little complicated initially because it has to be attached to the bodice lining while also maintaining the blousiness of the back bodice. Tasia's instructions are, again, very clear on this and it turned out perfectly.


Sometimes I have the experience of a pattern literally 'talking' to me, hopefully I'm not the only sewist that this happens to! .......

Saltspring: "I really, really, really want to be sewn in jersey, please please, please?"

Me: "No, that's ok, I'm happy to sew you in chiffon, it's just the right drape for you."

Saltspring: "Well, Liberty jersey has a drape too, and there some lovely striped jersey on Susan's Sewbox website."

Me: "I don't really have the time to sew two versions so...."

Saltspring: "Mmm, what about using these perfectly matching ribbons for the straps and omit the zip, that will be much faster, please, please, please!!!"


Me: "wellll...."

Saltspring: "and you can cut the stripes on the bias for more drape and for fun chevrons"

Me: "ok, ok, ok"

Saltspring: "Yes, yes, yessss!!!!!"


So I just couldn't resist a version in jersey, and it's a medium weight jersey, so I was surprised the dress worked in this heavier fabric.


As this was the second version I sewed, I made some changes.


To sew the chevrons, my first attempt, I added an extra seam in the centre front bodice and the centre front skirt and cut the striped fabric on the bias, matching the stripes.


There was no need for the zip as the stretch of the fabric and the elastic at the waist allow the dress to be easily put on and taken off.


The pictures don't accurately reflect the colour of the ribbon from Jane Means. It's a bright turquoise, with a strong contrasting deep pink, and it perfectly matched the colours of the jersey, irresistible really!


And the real test? I love how these dresses turned out and they have been worn, a few times. The jersey dress has been perfect for the beach in our recent heatwave, and I wore the red chiffon dress going out for dinner on holidays........


Pin It Now!  

Friday, January 20, 2012

Hoping to sew a Minoru!

It has taken me ages to decide on fabric for this coat, so I didn't commit to joining the sewalong on the Sewaholic blog ....... yet!
I want to sew a raincoat, but finding a waterproof fabric I liked has taken me weeks of searching, mostly because I didn't want a solid colour, or to use laminated cotton

I had narrowed it down to some lovely Westfalenstof coated cottons or Hilco coated cottons, and finally went for the Hilco which I bought from Dotsnstripes. But OMG!! :-) it's so 'flowery' I'm still not sure I'll be able to carry off wearing this, and maybe I should be making it for my daughter.


I had picked a flannel for the lining, as our weather here is wet and cold. The flannel was prewashed twice, but just this morning I decided I didn't want to use it so found an organic red cotton in my stash that I'm happier with.

The sleeves will be lined with the dots, which is a silk that I got as a Christmas present last year (2010).


Hilco have very good quality fabrics, so I didn't doubt that it was waterproof. I still tested it, just for a picture. It will be interesting to see how it deals with heavy downpours when I'm collecting the children from school.

I considered waterproofing the seams, as I remembered that Dawn from Two on Two off did a post on that a while back, but getting these type of products isn't easy. There is a UK site Pennine that looks good, maybe for a future coat!


So far, I have cut and marked the outer fabric, after raising the elastic placement and shortening the sleeves.
Hopefully I'll get to sew it before I chicken out and decide that flowers are not 'me'! Pin It Now!  

Monday, July 25, 2011

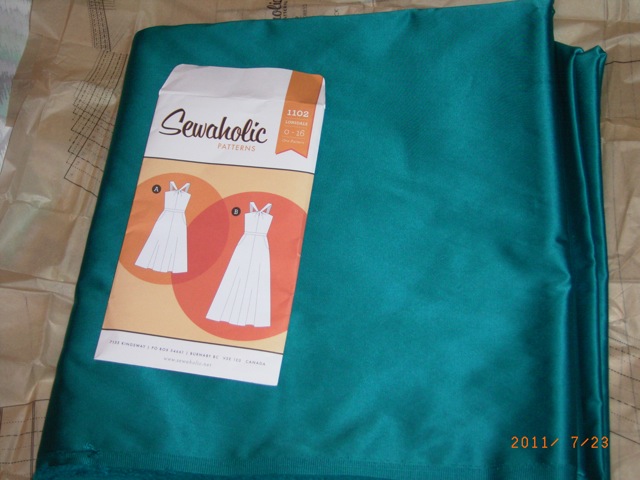
Working on a New Dress for me - Lonsdale by Sewaholic.

Treating myself for my birthday, I went to buy some Liberty Needlecord from Sewbox.co.uk (hmmm, treating myself by buying fabric for my daughter??) and I noticed that the newest Sewaholic pattern was in stock. My brother-in-law's 40th birthday is on in a few weeks, and I thought I might make myself a new dress, so the pattern arrived on Friday.

I really didn't mean to start this dress. I thought I might wait for the sew-a-long on the Sewaholic blog.
The blouse and dress I promised to make for my mother are still in the pattern drafting and alteration stage, but the Lonsdale dress was calling me so loudly, that I decided last night at 9pm after the younger two went to bed that I would start.


The fabric is a cotton with some stretch and a lovely drape that I bought from my local fabric shop. She sometimes stocks ends of bolts from RTW designers, and this is a Karen Millen piece and I found the colour irresistible. I had 2.60m at 144cm wide, which I hoped might do if I cut the bodice lining in a different fabric. I also cut the front skirt piece on a fold to help save fabric and I omitted the pockets, though I had just enough fabric left to cut them if I wished.

Needless to say, no muslin, but based on the finished measurements on the pattern envelope. I decided on a 12. However, I tissue fitted the waistband piece and got a fright when it wouldn't go around me (too much MIL's apple tart for tea!) I then cut a size 14!


I sewed all the bodice pieces last night, and tried it on for fit this morning.


There was some gaping at the top edge and when I fit the bodice closely, I could overlap the back by about 5cm. This is a fitting rather than a pattern issue, and because I decided I preferred the bodice very close-fitted, I took in the side seams.

I ripped out the side seams and re-sewed them, sewing with a much larger seam allowance at the top. When I went back to compare the pattern piece, it equaled to a size 8 at the top out to a 12 at the waist.


This felt to be a much better fit on me.

The waist edges were left uneven, but as I am also short-waisted, I decided to sew the waistband higher, though the pattern pieces have shorten/lengthen lines marked. A lot of this could have been prevented if I did a muslin, ha! The construction of the neckline is a neat design, and needs lots of close clipping so it doesn't pucker.


So this is where I'm at, terrible pictures and all!! It is not finished, but not bad for 6/7 hours work.

I have to understitch the neckline, turn up the hem, stitch the lining to the zipper tape, and sew the lining waistband to the outer waistband. These last 2 steps are explained differently in the pattern instruction sheet. I chose to sew the lining at the waistband differently.


I'm very impressed with this pattern, it's the first one I've tried from Sewaholic. I love, love the pattern instruction sheet, the best I've come across which suits my style of sewing. When I skimmed through it first I thought it could do with more detail, but reading it, this is the perfect pattern sheet for me. It's not too wordy, each step has a drawing to clearly explain it, and I could visualize the construction method and steps quickly and easily, and then decide if I wanted to sew it in the same or a different order.

After my burst of energy in getting this sewn, I hope I won't be finishing it the day of the party! I will get some better pictures in the next day or two.

Pin It Now!