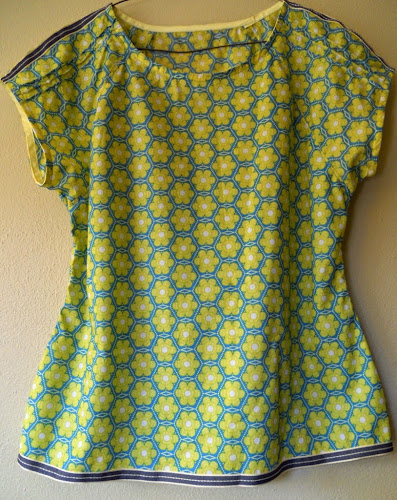
Sewing ribbon to the hem edge of a garment is an easy finishing technique. It adds an extra detail and can also be used to preserve the length of the hem. I regularly use ribbon to finish hems as well as sleeve and neckline edges, though I wasn't always confident in doing so. The soon-to-begin Belcarra Sewalong means that it's as good a time as any to show how I sew ribbon hems.
I sewed ribbon hems for the two Belcarra blouses from Sewaholic Patterns that I recently made. I liked the unhemmed length of the blouses, and didn't want to turn up a full hem. Also, the fabric in both was lightweight, so I wanted to add a little weight to the hems.
A huge variety of ribbons will work for hemming purposes. It is useful, but not necessary, to match the ribbon type with the fabric type. For the beige Liberty tana lawn cotton Belcarra blouse, I used a cotton stitched ribbon from janemeans. For the green AnnaMarie Horner cotton voile blouse, I used a polyester ribbon also from janemeans.
I would strongly recommend prewashing the ribbon in the same manner that you will treat the finished garment.
What you need:
-A sharp/new sewing machine needle
-Good quality grosgrain or cotton ribbon, the same length (+1.5cm overlap) as the hem
-Matching thread colour - matched to the ribbon colour rather than the fabric.
-Garment with side seams sewn & finished, ready for hemming
Step 1:
Place the wrong sides of the fabric and ribbon together. If the ribbon doesn't have a wrong side, choose one side as the wrong side.
Place the ribbon on the fabric so that the right side of the ribbon and the wrong side of the fabric both face up as in the picture
Ensure the ribbon overlaps the fabric edge by approx 1cm or up to half the width of the ribbon.
Step 5
When you reach the folded short end of the ribbon, sew across the ribbon width and backstitch to finish.
Step 6:
Press hem edge again.
This technique works perfectly on straight hem edges, but will also work on a slightly curved edge. If you wish to sew a ribbon hem on a circle skirt/dress edge, a narrow ribbon will work better.
Pin It Now!


Oh I love this! I often want my hems longer but I like the extra weight so it hangs perfectly. Great pics & tutorial, thanks!
ReplyDeleteThanks Karen, it's such a useful technique to know :-)
DeleteGreat technique! It gives a lovely finish.
ReplyDeleteSue, thank you :-)
DeleteThe ribbon hem gives such a nice finish! Thanks for sharing how you do it.:)
ReplyDeleteCindy, glad you like it :-)
ReplyDeleteThis is a wonderful article, Given so much info in it, These type of articles keeps the users interest in the website, and keep on sharing more ... good luck. where to buy hemp buds
ReplyDeleteI needed a refresher course. Using ribbon to face narrow side slits to increase the hip measurement. Thank you!
ReplyDeleteI love how this technique adds a polished touch to garments.
ReplyDelete