Showing posts with label sewing dresses. Show all posts

Tuesday, September 27, 2016

Pattern Testing & New Azaire Pattern Giveaway [Closed]

Update: Giveaway closed & thank you for the comments. The pattern goes to comment number 4! Congratulations Carmen, I'll be in touch.


The Azaire dress and top is the newest sewing pattern from Gather and I was lucky enough to be a pattern tester. Caroline and Sandra (from Gather) have also offered me a copy of the pattern to give away!


The Azaire pattern comes with a detailed instruction booklet which includes size charts (sizes 8 to 18), fabric requirements, body and finished garment measurements, fabric and cutting layouts and very helpful diagrams illustrating the sewing instructions.


I sewed the Azaire dress (wore it to a wedding) and had an excellent pattern-testing experience particularly as the end result is a dress that I love wearing.


Though my measurements fall between 12 and 14, the "Finished Garment Measurements" included with the pattern indicate that the Azaire has a loose silhouette so I chose to sew size 12.


I enjoyed the whole process of testing this dress. My choice of fabric wasn't the best, being transparent! This meant I had to add an extra lining to the centre front and back of the dress.


The details of this dress allow for customisation and mixing different fabrics to highlight the style lines. It has a curved yoke, boat neckline, hi-low peplum, two sleeve options and front and back seams for fitting. Initially I wondered if the silhouette was too loose, but the style lines mean that the dress and top can be easily fitted. After testing the pattern, I fitted the dress more at my waist by sewing curves on the front style lines.


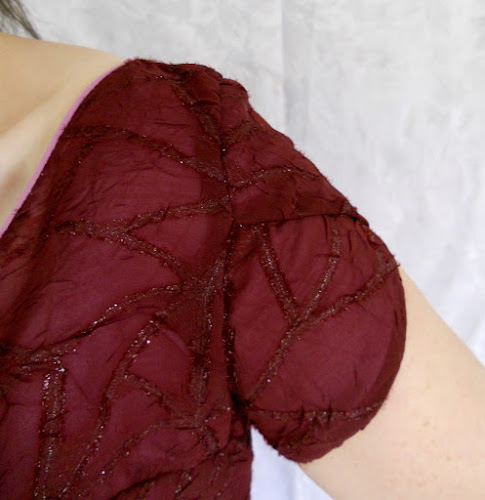
The pattern includes short petal sleeves on the dress and these are probably the most complicated aspect of the pattern. The sleeves are lined and overlapped so there are four layers of fabric to keep under control. The instructions for the sleeves are detailed and easy to follow. My only suggestion would be to muslin or fit the sleeves as I found them narrow-fitting. My 'strong' upper arms from heaving lifting in my previous nursing career means that I often have to take account of this!!


The pattern pieces all fit together perfectly and I was particularly pleased with how neatly I was able to match the back seams at the invisible zip.


It was such a joy to test the Azaire and I would love to pass a little of that on.


Just comment below with a way to contact you by email and I'll randomly pick a name next next Monday Oct 3rd. I will post anywhere in the world.


Pin It Now!  

Monday, March 28, 2016

A 'Drapey' Japanese Bubble Dress

When I read about Japanese Pattern Sewalongs there is often a related increase in my sewing, and it was no different when Celina from petitapetitfamily.com and Mie from sewinglikemad.com wrote about their year long sewjapan series back in January.

This is the Japanese pattern book I chose as the dress on the cover is one of my favourites and sewn (& blogged) many times - a sweet version in ladybird corduroy & a pair of bubble dresses for twins.
This time I chose a drapey, pre-pleated fabric from my local fabric shop, though I had doubts if it would hold the 'bubble' effect of the fabric.

When it was sewn up, the fabric gave an a-line shape to the dress. My daughter who had wanted a more fitted dress was happier with this.
This bubble dress is easy to sew, and the Japanese instructions are easy to follow because of the detailed diagrams. My one issue with this pattern is the joining of the lining and the outer fabric which leaves an exposed seam.
As usual, I prefer a clean finish with all seams hidden, something that is particularly important for children's clothes.
For this version I cut the back pattern piece in two, rather than placing it on the fabric fold. (I listed the sewing instruction steps in this post). This allows the dress hem to be pulled out through the back seam and sewn so that it is hidden when the dress is finished . I then sewed an exposed zip and attached the lining at the same time to finish the dress.
The finish is so clean that the dress could almost be worn inside out.
The 'bubble' effect allows for the imagination of an active 9 year old!
We felt the solid colour of the fabric needed something else, so settled on adding ribbons to one of the shoulder seams. We decided that this brown stitched ribbon from janemeans.com would work. These can be left untied or tied in bows. Interestingly, after this was sewn, Burdastyle included a girls dress pattern in the March magazine which had wide ribbon on both shoulders!

Pin It Now!  

Monday, July 27, 2015

A Japanese Pattern Book for Beginners - Sewing For Your Girls


Sewing For Your Girls by Yoshiko Tsukiori is much more suitable for beginners than most other Japanese books that I've sewn from. It was originally published in 2011 and is one of the recent English translations by Tuttle Books.


It provides 8 basic patterns for dresses, tops and shorts with 7 variations. All patterns, except one (which is easily drafted) are included as full-sized pattern pieces in a pocket inside the back cover. The patterns are for girls, though the shorts and overalls could be sewn for boys, and the sizing is based on height - approximately equivalent to age 2 to 8 years.


This Japanese pattern book would be perfect for a beginner at sewing. As well as pictures of the clothes and instructions for all of the patterns, most of the book is devoted to photo tutorials on how to sew.


Many Japanese Pattern books are not generally suitable for beginners. They rely on detailed diagrams to illustrate sewing instructions, so include much shorter descriptions of sewing steps. The other book of adult-sized patterns by this author that I sewed from, would not be as useful for anyone beginning sewing.


The three photo-tutorial sections are

  1. Basics of Dressmaking,
  2. A detailed Step-by-Step to make one of the dress patterns and
  3. Basic Sewing Techniques.


1. The Basics of Dressmaking is very well-presented. It includes descriptions of the fabrics used in the book and emphasises the importance of prewashing. Basic equipment is described and detailed pictures on Tracing a Pattern, Cutting out Fabric, Marking Symbols and Using a Sewing Machine are also shown.

2. There is a fully illustrated, complete photo-tutorial on how to sew the first pattern in the book and it includes techniques like creating bias tape, reinforcing pocket edges, and neatly finishing the armhole and shoulder frill. Every one of the numbered steps is pictured in detail.


3. There are 33 pages of tutorials on Basic Techniques which thoroughly illustrate all the steps needed for sewing techniques to sew the patterns in the book. Everything from facings, collars, hand sewing, plackets, invisible zip, pockets and shirring are covered.


I sewed two dresses from this book. The first was a sailor dress from Applied pattern 7 where I repurposed an old shirt for the fabric.


The second dress I sewed was Basic Pattern 5. This is the only dress where a pattern has to be drafted. But it is very straightforward as it utilises 2 rectangles which are based on the child's measurement.

It is a number of years since I've used shirring and it's as easy as I remember. There is a photo tutorial on how to shirr fabric which a beginner would find very helpful.


I used ribbon for the straps as I had a perfectly matching vintage stitched janemeans ribbon, but the steps needed to create straps are also given in the book and are easy to follow.


This dress was a very easy and quick make and would be a very convenient way of using a half-metre of fabric from your stash. Before I shirred the dress, my daughter thought the fabric looked like a curtain, but that didn't bother her too much once she tried it on!


(Tuttle Publishing sent me this pattern book free. All opinions are my own. I have been happily sewing from Japanese language pattern books since 2009)


Pin It Now!  

Thursday, May 28, 2015

A Girl's Dress with Ribbon Sailor Collar

Sailor dress patterns have been on my 'to sew' list for my daughter for quite a while. Mostly I've been hoping that they would become a fashion trend. After waiting years for this trend to happen and seeing this 2014 Oscar de la Renta dress, it seems that there is a 2015 nautical Spring/Summer trend which is extending into Autumn/Winter. These mentions are good enought for me!

The pattern I used for the dress is from a newly released English translation of Japanese sewing patterns from Tuttle Books. 'Sewing for your Girls'. I intended sewing this pattern for a review of the book, but took a few too many shortcuts and didn't follow the pattern exactly. I also sewed a second dress and will review the book in my next post.


The pattern pieces were cut from a second-hand man's shirt, and I included the centre front button bands from the shirt as the dress opening. This is very different from what the pattern suggests, but made it so much quicker to sew the dress....... and I didn't have to sew buttons or buttonholes!


The sailor collar pattern pieces (undercollar and main collar pieces) were cut from the sleeves.


The details are my favourite parts of this dress. Sailor stripes are usually created by sewing rows of a contrasting colour. Any of the striped and stitched ribbons at Jane Means would make an excellent choice for a collar like this. I chose a purple stitched janemeans ribbon which created the illusion of stripes. I mitred the ribbon at the corners for neatness, and used Liberty of London bias binding for the neckline and armholes instead of the facings in the pattern.


My daughter found these pom-poms and appliqué in my stash, so we added them and a purple ric-ric hem to complete the dress.


Pin It Now!  

Tuesday, March 31, 2015

Burda knit dress & using tiny ribbon pieces

 
All parents of school-going children should be prepared for the 'colour' days that happen in schools which are often for fundraising. There are red days to support county teams, blue days for autisim awareness, green days for our national Saint and last week we had a yellow day for cancer support. I don't normally sew for each colour day, but this time I was glad of the excuse to take a break from communion dress sewing.

This girls dress is from the current issue of Burdastyle magazine 4/15 no.136. Every month there are a few children's patterns in the magazine and I have always liked their sizing and fit. This dress was no different. I graded up a size to 134, just to allow for some growing room, but the dress would have still fit well.


It's an interesting design, with the neck facing applied to the outside. It is also clearly well-designed as the facing fit beautifully and I love how neatly the shoulder seams align. This would be straightforward on a woven fabric, but usually much more difficult on a knit fabric.


Though I used a stable knit fabric (not very stretchy) I didn't want the shoulders to get stretched with wear. The best way to do this is to stabilise the shoulder seams with interfacing which is hidden. I took a different approach by choosing to make the stabiliser more obvious and picked some janemeans stitched ribbon.


The green stitched ribbon is placed under the shoulder seam while it is being sewn, and a second line of stitching is sewn along the ribbon and seam edge. Once the ribbon and seam are pressed it forms a neat finish to the seam as well as preventing the shoulder seam from stretching and sagging. Of course this is also a perfect way to use those tiny pieces of beautiful ribbon leftover from bigger projects.


I altered the pattern by not including a back opening, and not adding neckline and pocket piping. The instructions recommended sewing the side seams and then inserting the sleeves but it was much quicker to sew each sleeve to it's armhole and the sew each sleeve seam and side seam all at once.


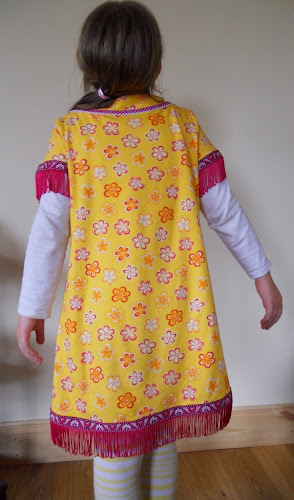
I just had a day to sew the dress so unusually didn't consult my daughter on the fabric and the pattern, but she was thrilled to have a yellow dress and got very involved (obviously, I suppose!) in picking out the fringe and neckline trims.


Pin It Now!  

Tuesday, December 30, 2014

Sleeping Beauty - A Costume for the Panto.

As Christmas (aka pantomime season) and my daughters birthday are close together, her godmother takes her to a pantomime in Cork, our nearest city. As part of this treat, my daughter likes to wear the costume of the main character. So in the past I've sewn an Alice dress, a Cinderella dress (not blogged), and this year it was Sleeping Beauty's turn.


Pink is the colour most associated with Aurora/Sleeping Beauty's dress, but in the film and books, she wears a different dress before she 'falls asleep'. Though my daughter hasn't quite left the 'pink phase'! she didn't take much convincing when I showed her pictures of the other dress worn by Aurora.
An online search for images of the dress, led me to pick View 2 of this vintage Advance pattern 5816 that I already had, because of its v-shaped bodice and skirt.
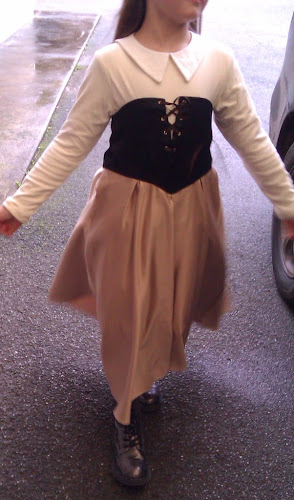
The main additions the skirt pattern needed was length, and extra fabric added to the centre front and centre back to create pleats. I also curved the top of the bodice at the front and back armholes and cut a centre front seam so that I could create a lace-up bodice.
The sleeves and upper bodice were adapted from Butterick 5890. I recently used this pattern for the Elsa Coronation dress which I sewed for Halloween. I had to draft the white collar myself using a flexible ruler, then measuring the neckline curve once I had sewn the shoulders of the front and back bodices. I've never drafted a collar before, so was surprised and pleased that it lay flat and looked so good.


The dress turned out exactly as we both imagined, especially the centre front which has eyelets and is laced up with narrow grosgrain ribbon.


The fabrics are all from Vibes and Scribes, a well-stocked fabric, wool and haberdashery shop in Cork that now delivers online. The top bodice is cream cotton jersey, the main bodice is a soft-textured black polyester, and the skirt is a medium-weight sateen which was the last piece on the bolt.


Though it seemed like I was cobbling together parts of patterns, and making up pieces and instructions as I went along, the dress worked and most importantly she was delighted with it.


Pin It Now!  

Monday, October 13, 2014

Fabric Search for Elsa's Coronation Dress

If it's Elsa, it must be Frozen! We were late to the Frozen party in this house, and finally bought the film during the summer holidays. It was watched on the few wet afternoons we had this summer, my 7yo daughter & 9yo son loved it, but the rest of us could be found openly watching & enjoying it too!


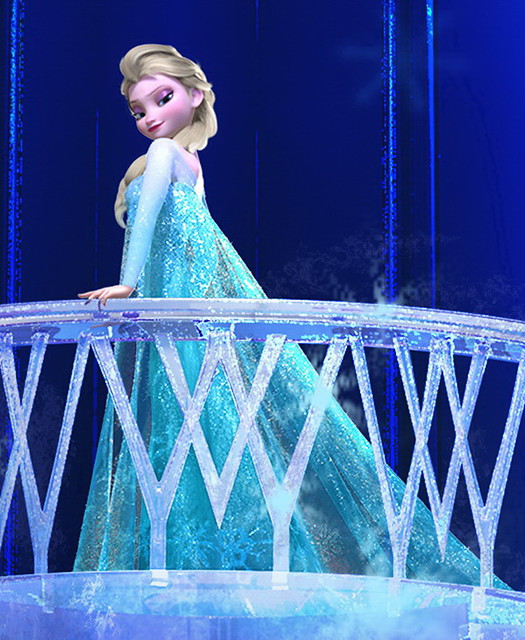
The most popular costume from the film is Elsa's shimmery blue Ice Queen/Snow Queen dress, but my daughter has her heart set on the coronation dress. There are excellent and detailed pictures on this blog -Arendellekingdom

Some research on the film and that dress has thrown up some interesting links. One of the most fascinating is from an illustrator on the film, Brittney Lee, who blogged about her design process. She also provided information on the interesting ’rosemaling' designs in the dress fabrics and throughout the film.

There is also an excellent interview with the costume designer, Jean Gillmore, from Frozen on the Tyranny of Style blog.

It was very interesting to discover that many of the illustrations of the costumes are based on the properties of fabrics from which the dresses in Scandanavian countries would have be sewn. For example the weight of a fabric would affect its drape and movement. This is reflected in the animation in the film.


With all this inside knowledge, I searched for fabric online which would be suitable for a child's costume, and accurately reflect the costumes in the film.

The Coronation dress in the film seemed like a wool fabric, but that would be the most impractical fabric for a child's costume. Then I considered velvet, which would drape and move in a similar manner to wool.Many velvet dress fabrics available online are polyester and stretch velvets or velours, which would probably be most suitable. but I was looking for a fabric with more weight, so was drawn to using cotton velvet, which is expensive to buy in Ireland.


It took me ages to find the kind of fabric I wanted, either it was too stretchy, too expensive, wrong colour.....

After a very thorough search, I eventually found the specific colours for the coronation dress in a cotton mix velvet fabric from Fjøelner in Denmark. It turned out to be the perfect weight and was delivered extremely quickly.


This is where I'm at....


I already had black velvet and a suitable pattern Butterick 5980 (ViewD with longer skirt and long sleeves), so the dress and the Cape have been sewn up. Now I just need to figure out how to add the floral/scrolling designs to the velvet on the dress!


Pin It Now!  

Thursday, December 12, 2013

Ruffled Fabric Dress for a 7th Birthday

There are a quite a few makes to post about, and this seems like a good place to start!
 

My youngest turned 7 two weeks ago which, of course, means cake and is also, always, an excuse for a new dress.

She loved the ruffled fabric, which I had bought as a remnant piece from a local shop and the animals on the Stenzo corduroy fabric were always going to be a winner.


I planned on sewing this dress almost a year ago, and had already sewn up the ruffled fabric, but couldn't remember why I hadn't finished it. It was probably because of how time-consuming it was to sew with the ruffled fabric!

This fabric takes a lot of extra preparation and work. Care needs to be taken in cutting it out, especially with the curved yokes of this pattern. For the first time sewing with this fabric, a pattern with as many straight edges as possible would be better and avoid patterns with a lot of seam lines.

The ruffles at the side seams also needed to be carefully matched, and the easiest way of doing this was to baste them together first. The end result of that extra time and effort is very much worth it with the side seams neatly aligned!

The pattern, Mistinguette, is from a French company - Her Little World and it's one of their free patterns. Most of their beautifully designed patterns are for girls, with some for dolls and boys too.

I've sewn with their patterns a few times as the styles are a little more unusual that the widely available 'gathered skirt with plain bodice' type of pattern! This is a birthday dress from a few years ago (2011) and another dress & dolls dress from one of the sewing pattern books also published by Her Little World.


I was a little concerned that the hem yoke would restrict movement, so I cut a much larger size which is evident from the fit on the shoulders.

There was no need for me to upsize, as the dress is well designed. The hem band as in the pattern, falls just above the knee so that it doesn't affect the movement of an active 7 year old. It is slightly longer here because of cutting the larger size.

As my daughter gets older, I am very conscious of including her in the dressmaking process, despite the fact that I have clear ideas of styles I like and the fabric and notions I want to sew together!

The pattern calls for a button and loop closure at the top, but when the dress was finished we decided a lace zipper would look better. Though I preferred a pink or red lace zipper, she had her heart set on orange which picks up a minor colour in the fabric.

The dress was a hit and the lack of twirliness is more than compensated for by the movement of the ruffles on the fabric.


Pin It Now!